# Game Support Service Studio Guide
Through the studio console, you can set up metadata for stats, achievements, and leaderboards.
# Set Stat Metadata
# 1) Stat Metadata List
Check the set metadata list in the Stat List screen.
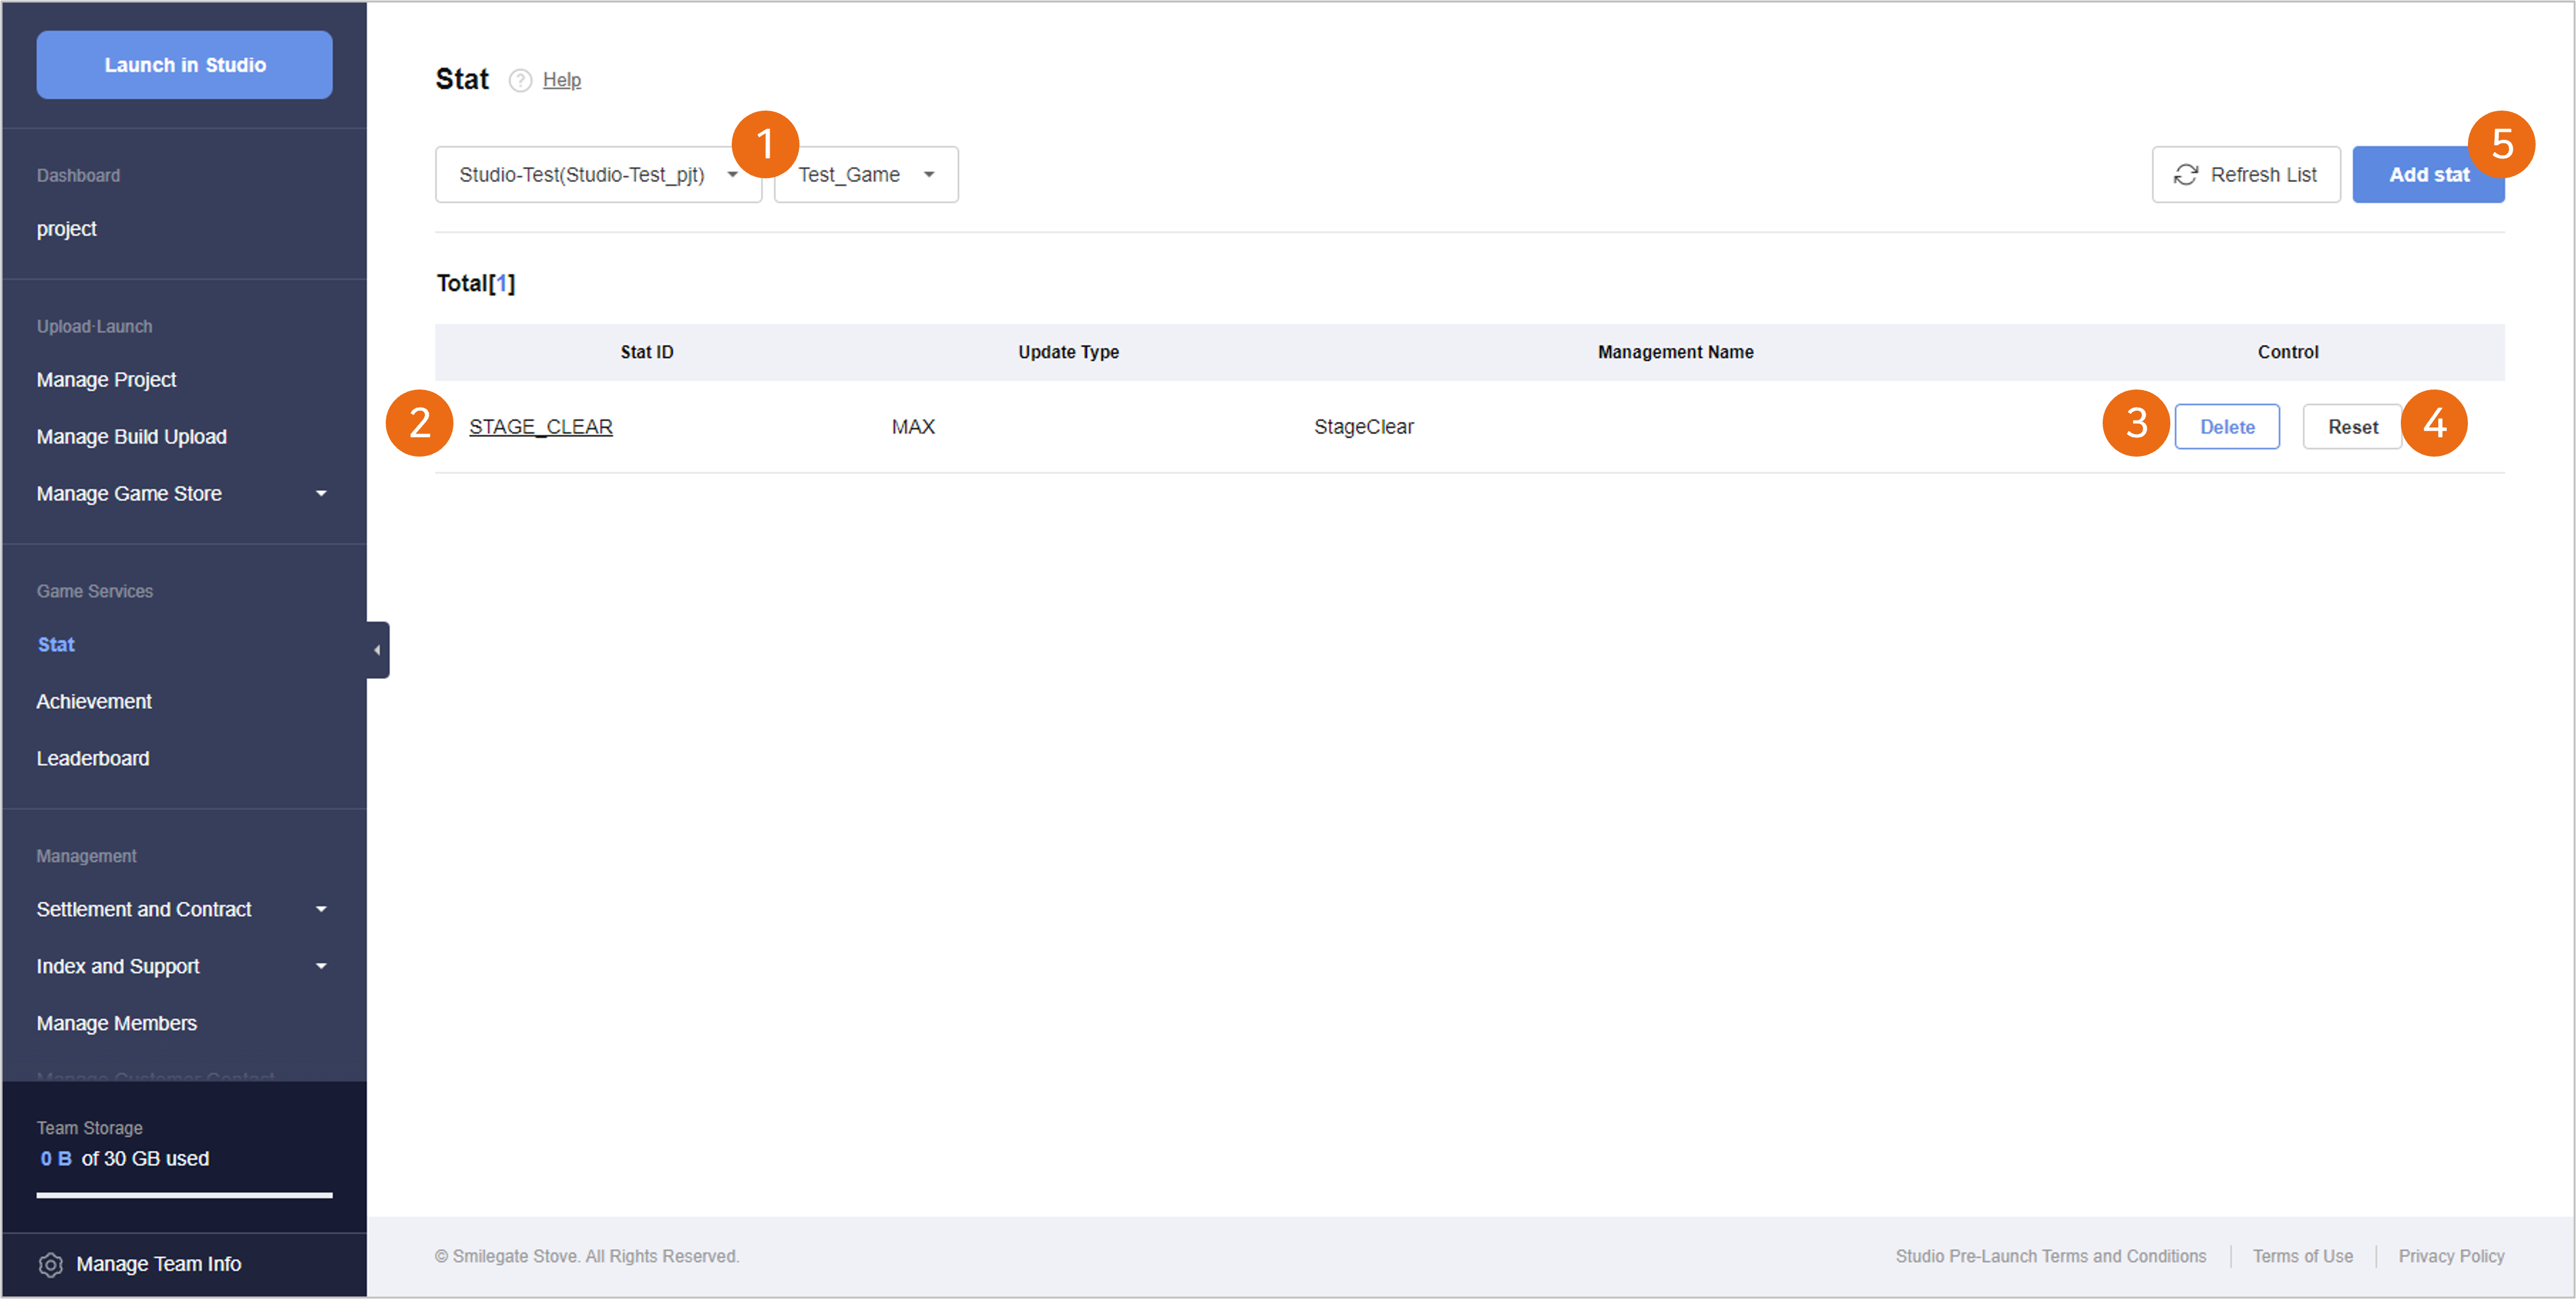
① Select Project and Game ID
- Select the Project ID and the Game ID for checking or setting the stat metadata.
- When there is no such Project ID or Game ID registered, checking or adding metadata can be limited.
② Stat Meta List
- You can check the Stat Metadata List registered under the relevant Game ID.
- When you select a Stat ID, you can check the details of the registered metadata and can edit the additional information.
③ Delete Stat Meta
- You can delete the registered stat metadata.
- When you delete stat metadata, the user play data loaded on the relevant stat are also deleted, so you need to be careful.
④ Reset Stat Data
- Reset the user play data loaded on the stat.
- The stat metadata are maintained, and only the user play data loaded on the relevant stat are reset.
⑤ Add Stat
- When you select the Add Stat button, the Add Stat Metadata pop-up will appear.
# 2) Add Stat Metdata
You can add stat metadata through the Register Stat Meta pop-up.
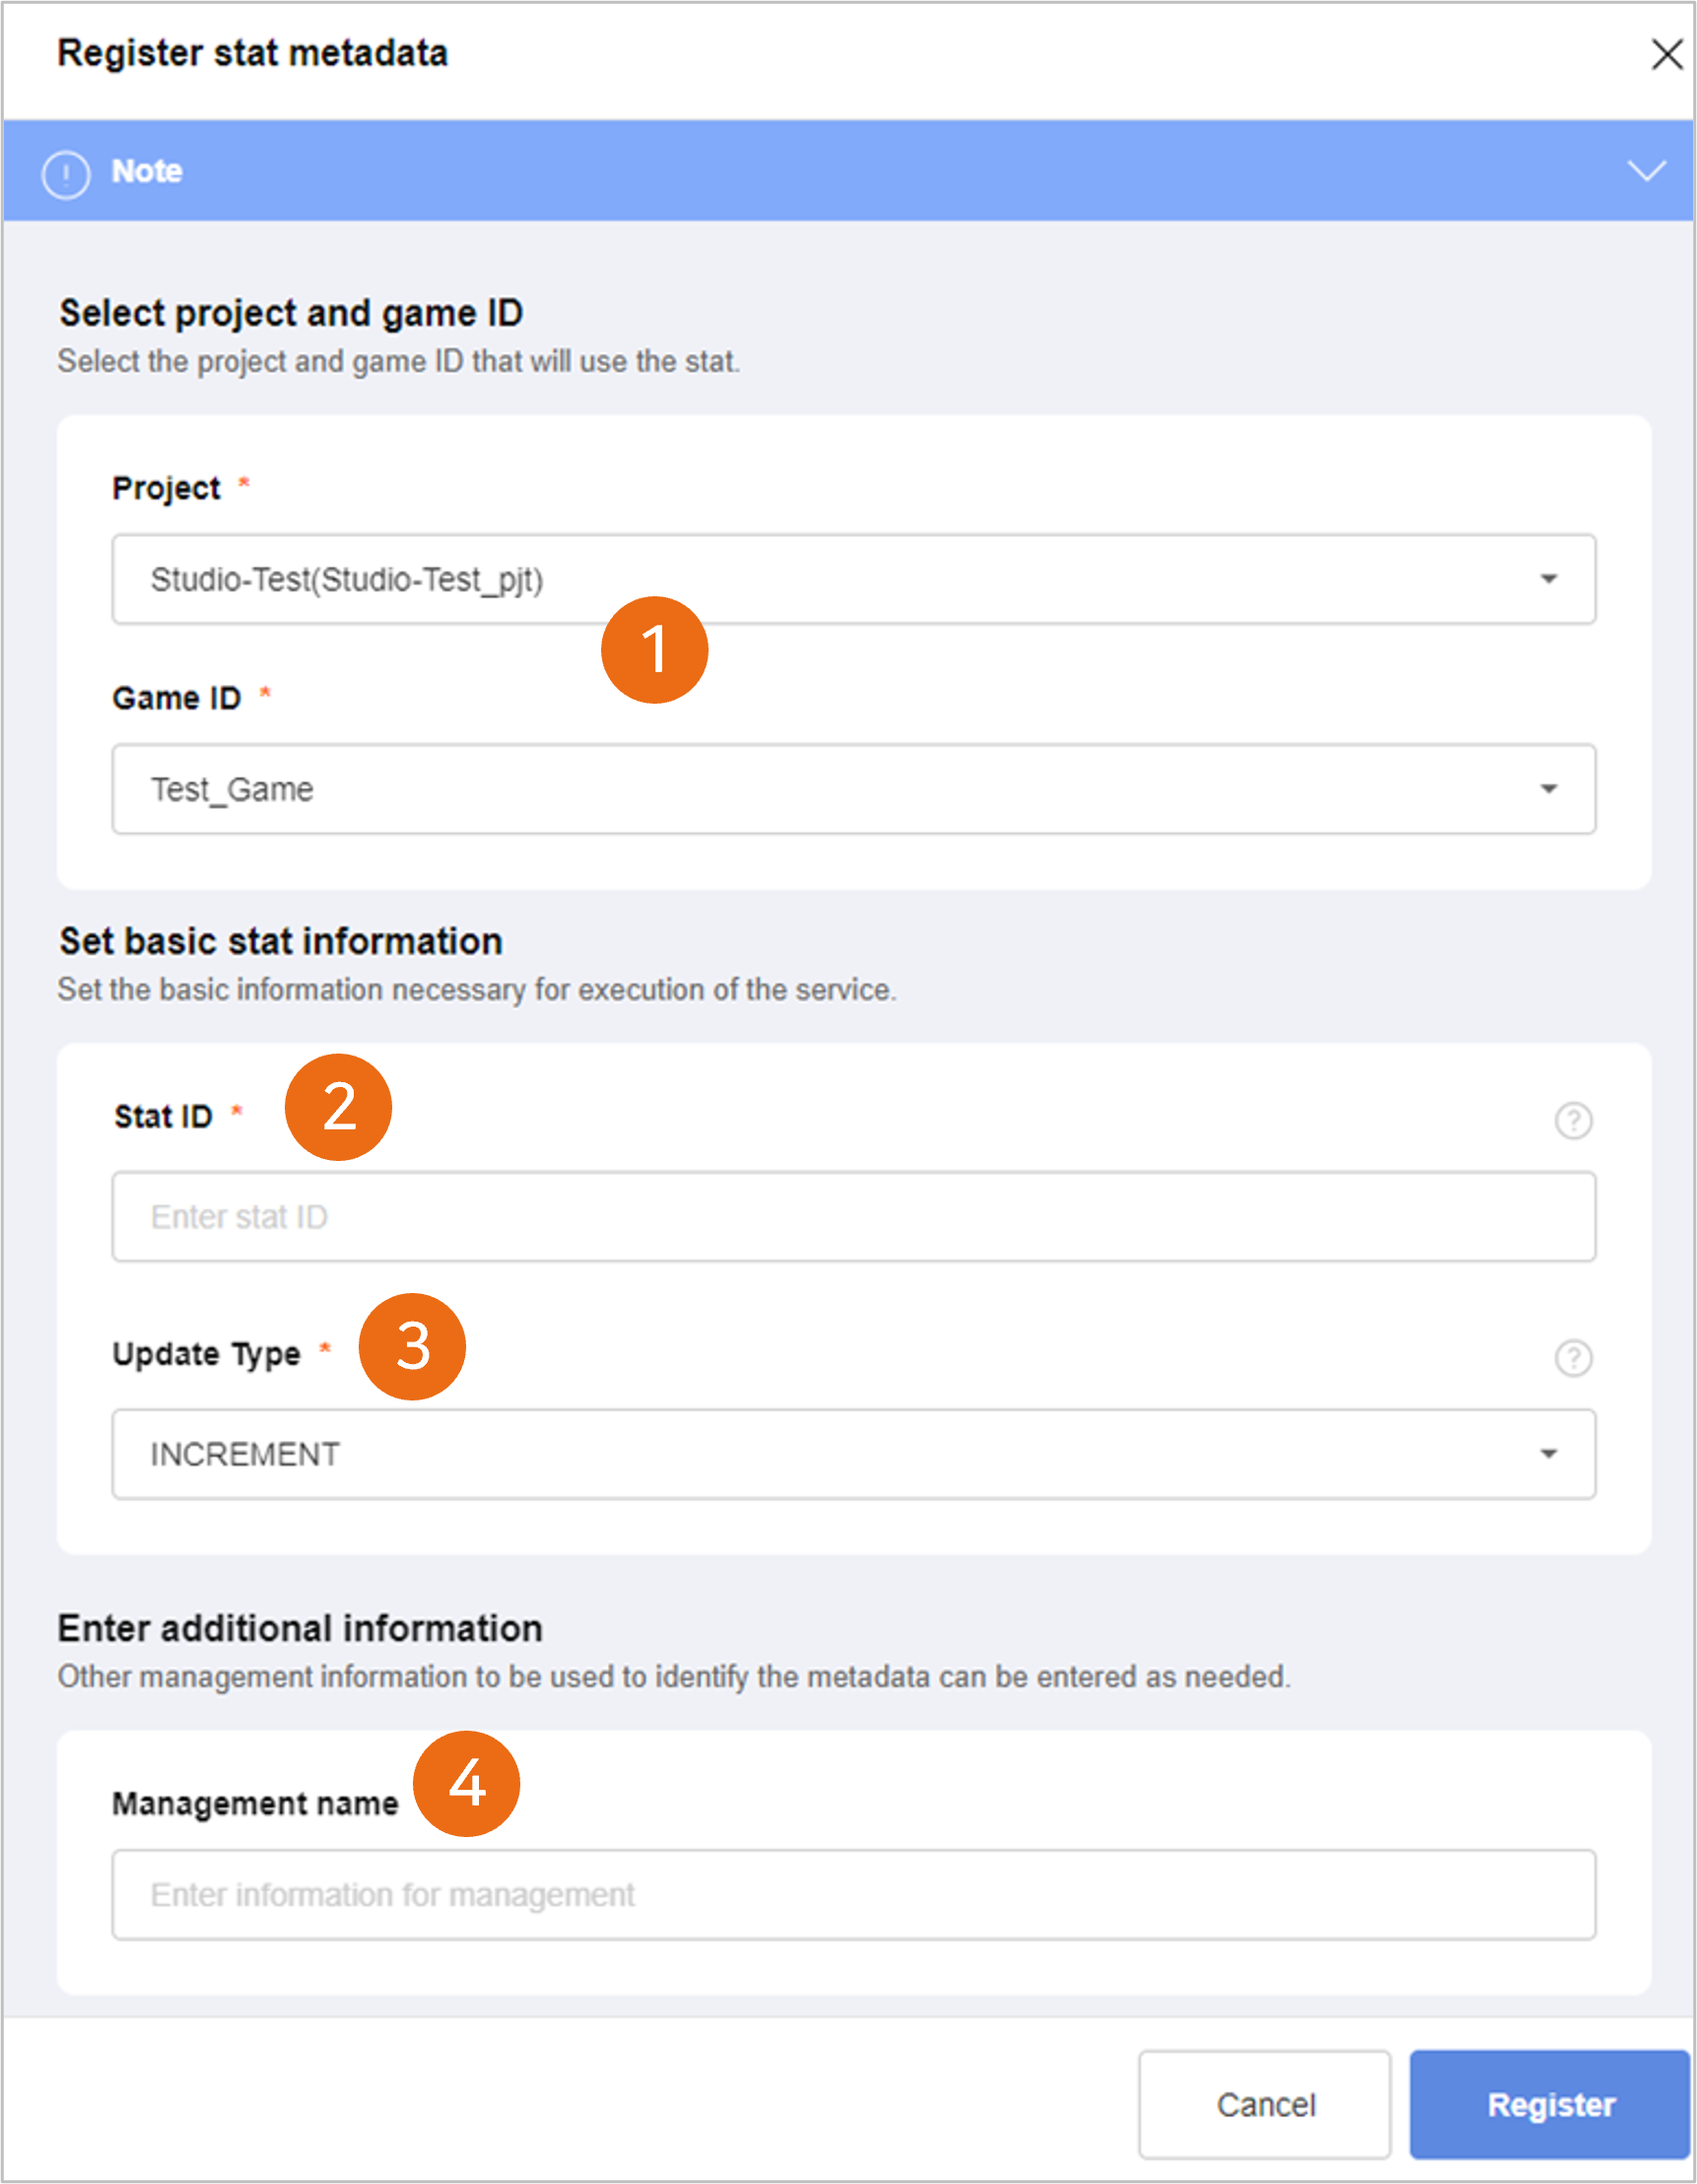
① Select Project and Game ID
- Select the Project ID and the Game ID for registering the stat metadata.
② Input Stat ID
- Enter the Stat ID to be used for linking.
- Up to 20 characters including English capital letters, numbers, underline (_), and hyphen (-) can be entered.
- The Stat ID is a unique value and a pre-registered Stat ID cannot be used again.
The Stat ID is used as the link key for transmitting game data when linking the SDK.
Through the stat, the stat data, achievement accomplishment points, and ranking points will be loaded.
③ Select Update Type
- Select the Stat Data Update Type.
- The provided update types are as below.
- INCREMENT: A method to add a new value to the existing value.
- REPLACE: A method to replace the existing value with a new value.
- MAX: A method to replace the existing value with a new value only when the new value is greater than the existing value.
- MIN: A method to replace the existing value with a new value only when the new value is smaller than the existing value.
④ Input Additional Information (Management Name)
- Select and enter the management information to be used for identifyng metadata as needed.
# Set Achievement Metadata
# 1) Achievement Metadata List
Check the set metadata list in the Achievement List screen.
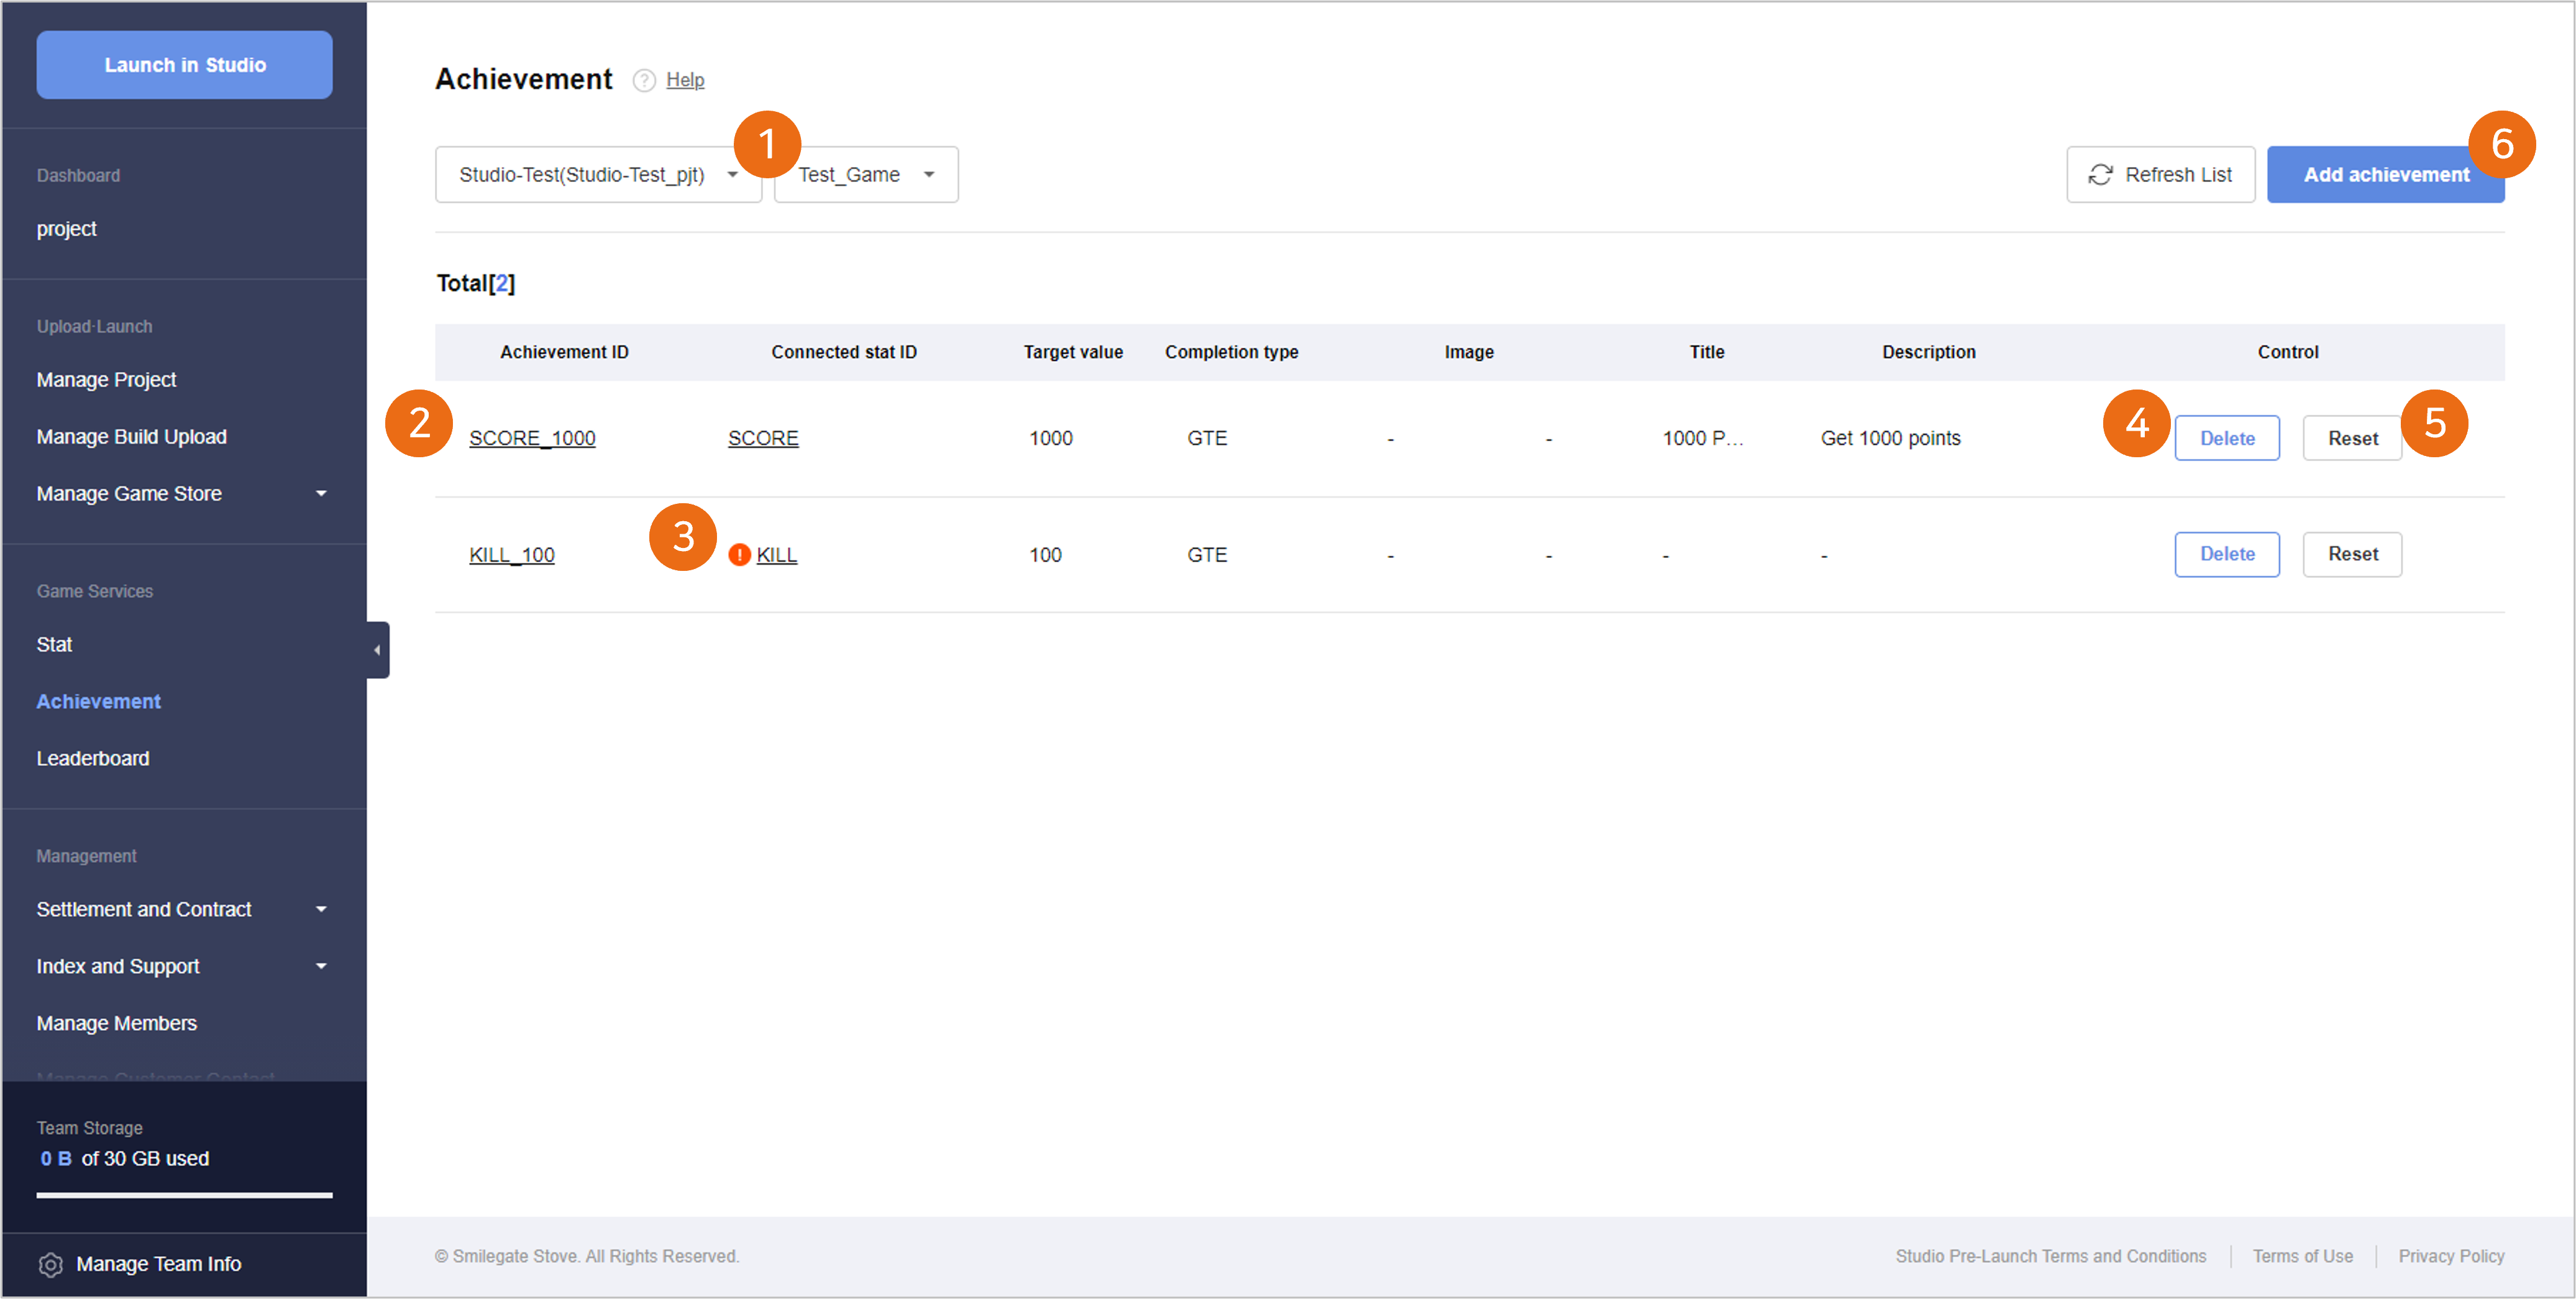
① Select Project and Game ID
- Select the Project ID and the Game ID for checking or setting the achievement metadata.
- When there is no such Project ID or Game ID registered, checking or adding metadata can be limited.
② Achievement Meta List
- You can check the Achievement Metadata List registered under the relevant Game ID.
- When you select an Achievement ID, you can check the details of the registered metadata and can edit the additional information.
- When you select a Stat ID, you can check the details of the stat metadata linked to the relevant achievement.
③ Linked Stat Deletion Status Notification
- When the stat metadata linked to the achievement are deleted, the Emphasis Mark will appear on the Link Stat ID.
- Here, normal operation is impossible, so you must check whether the relevant achievement is used or not, delete the achievement, or reset the link stat metadata.
④ Delete Achievement Meta
- You can delete the registered achievement metadata.
- When you delete achievement metadata, the loaded achievement accomplishment data are also deleted, so you need to be careful.
⑤ Reset Achievement Data
- Reset the user play data loaded on the achievement.
- When you reset, the achievement metadata are maintained, and only the loaded achievement accomplishment data are reset.
⑥ Add Achievement
- When you select the Add Achievement button, the Add Achievement Metadata pop-up will appear.
# 2) Add Achievement Metadata
You can add achievement metadata through the Register Achievement Meta pop-up.
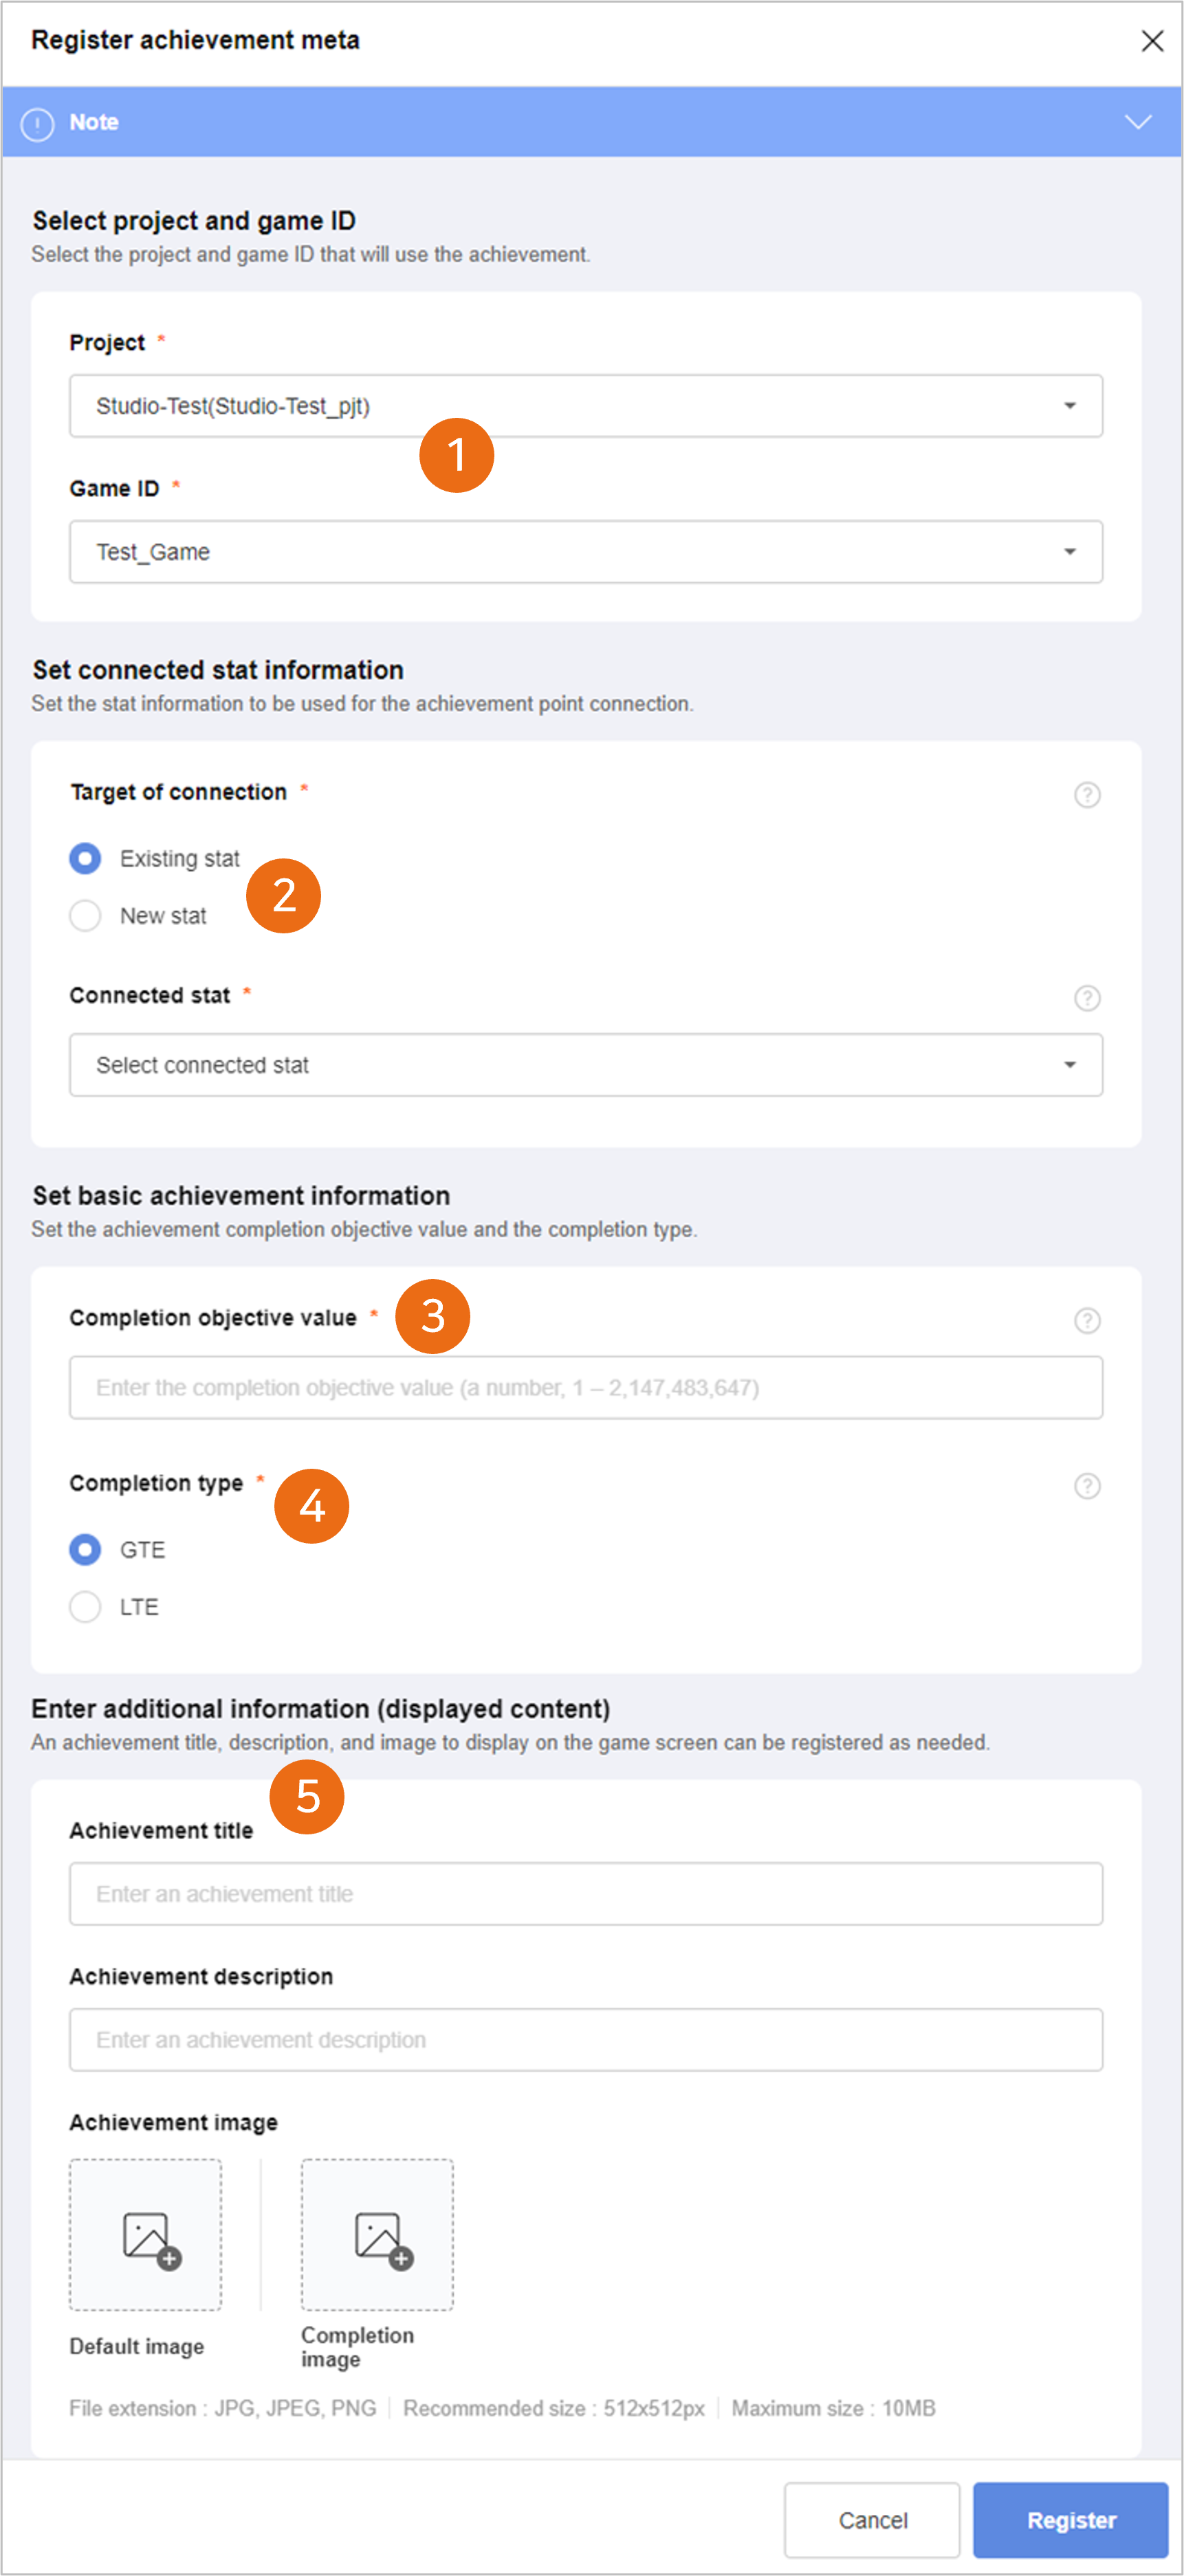
① Select Project and Game ID
- Select the Project ID and the Game ID for registering the achievement metadata.
② Set Link Stat Information
- Set the stat information to link to achievement points.
- The game play data are loaded as achievement points through the linked stat.
- When there is no registered stat to be linked, you can select the new stat creation method and register them all.
③ Input Accomplishment Target Value
- Enter the achievement accomplishment target value.
- If the achievement points loaded through the linked stat reaches the target value, it is processed as accomplished.
- The input range of the accomplished target value is 1 through 2,147,483,647.
The maximum value of stat is 2,147,483,647, so you must design a proper range of stat update values and achievement accomplishment target values.
④ Set Accomplishment Type
- Set the accomplishment type in accordance with the achievement points.
- The provided set types are as below.
- GTE(Greater Than or Equal): When the achievement points are greater than the accomplishment target value, it is processed as accomplished.
- LTE(Less Than or Equal): When the achievement points are equal to or smaller than the accomplishment target value, it is processed as accomplished.
- When the update type of the linked stat is MAX, it is replaced with only a value greater than the existing value, so the accomplishment type is fixed as GTE(Greater Than or Equal).
- When the update type of the linked stat is MIN, it is replaced with only a value smaller than the existing value, so the accomplishment type is fixed as LTE(Less Than or Equal).
⑤ Input Additional Information (Display Details)
- Register the achievement title, description, and image to be displayed on the game screen as needed.
- The registered information is provided when you search the achievement information after linking the SDK.
- Achievement Title: You can use it as the title information for representing the achievement.
- Achievement Description: You can also use it for describing the achievement.
- Achievement Image: It comprises the default image and achievement image, and can be used for expressing images of whether it is accomplished or not.
When the achievement metadata are completely registered, the Achievement ID is automatically created by the combination of the ‘Linked Stat ID’ and the ‘Accomplished Goal Value.’
You can make multiple achievements, which are not overlapped, by a single link stat and several accomplishment target values.
The created Achievement ID can be checked on the Metadata Registration Complete pop-up or the Achievement List screen.
# Set Leader Board Metadata
# 1) Leader Board Metadata List
Check the set metadata list in the Leader Board List screen.
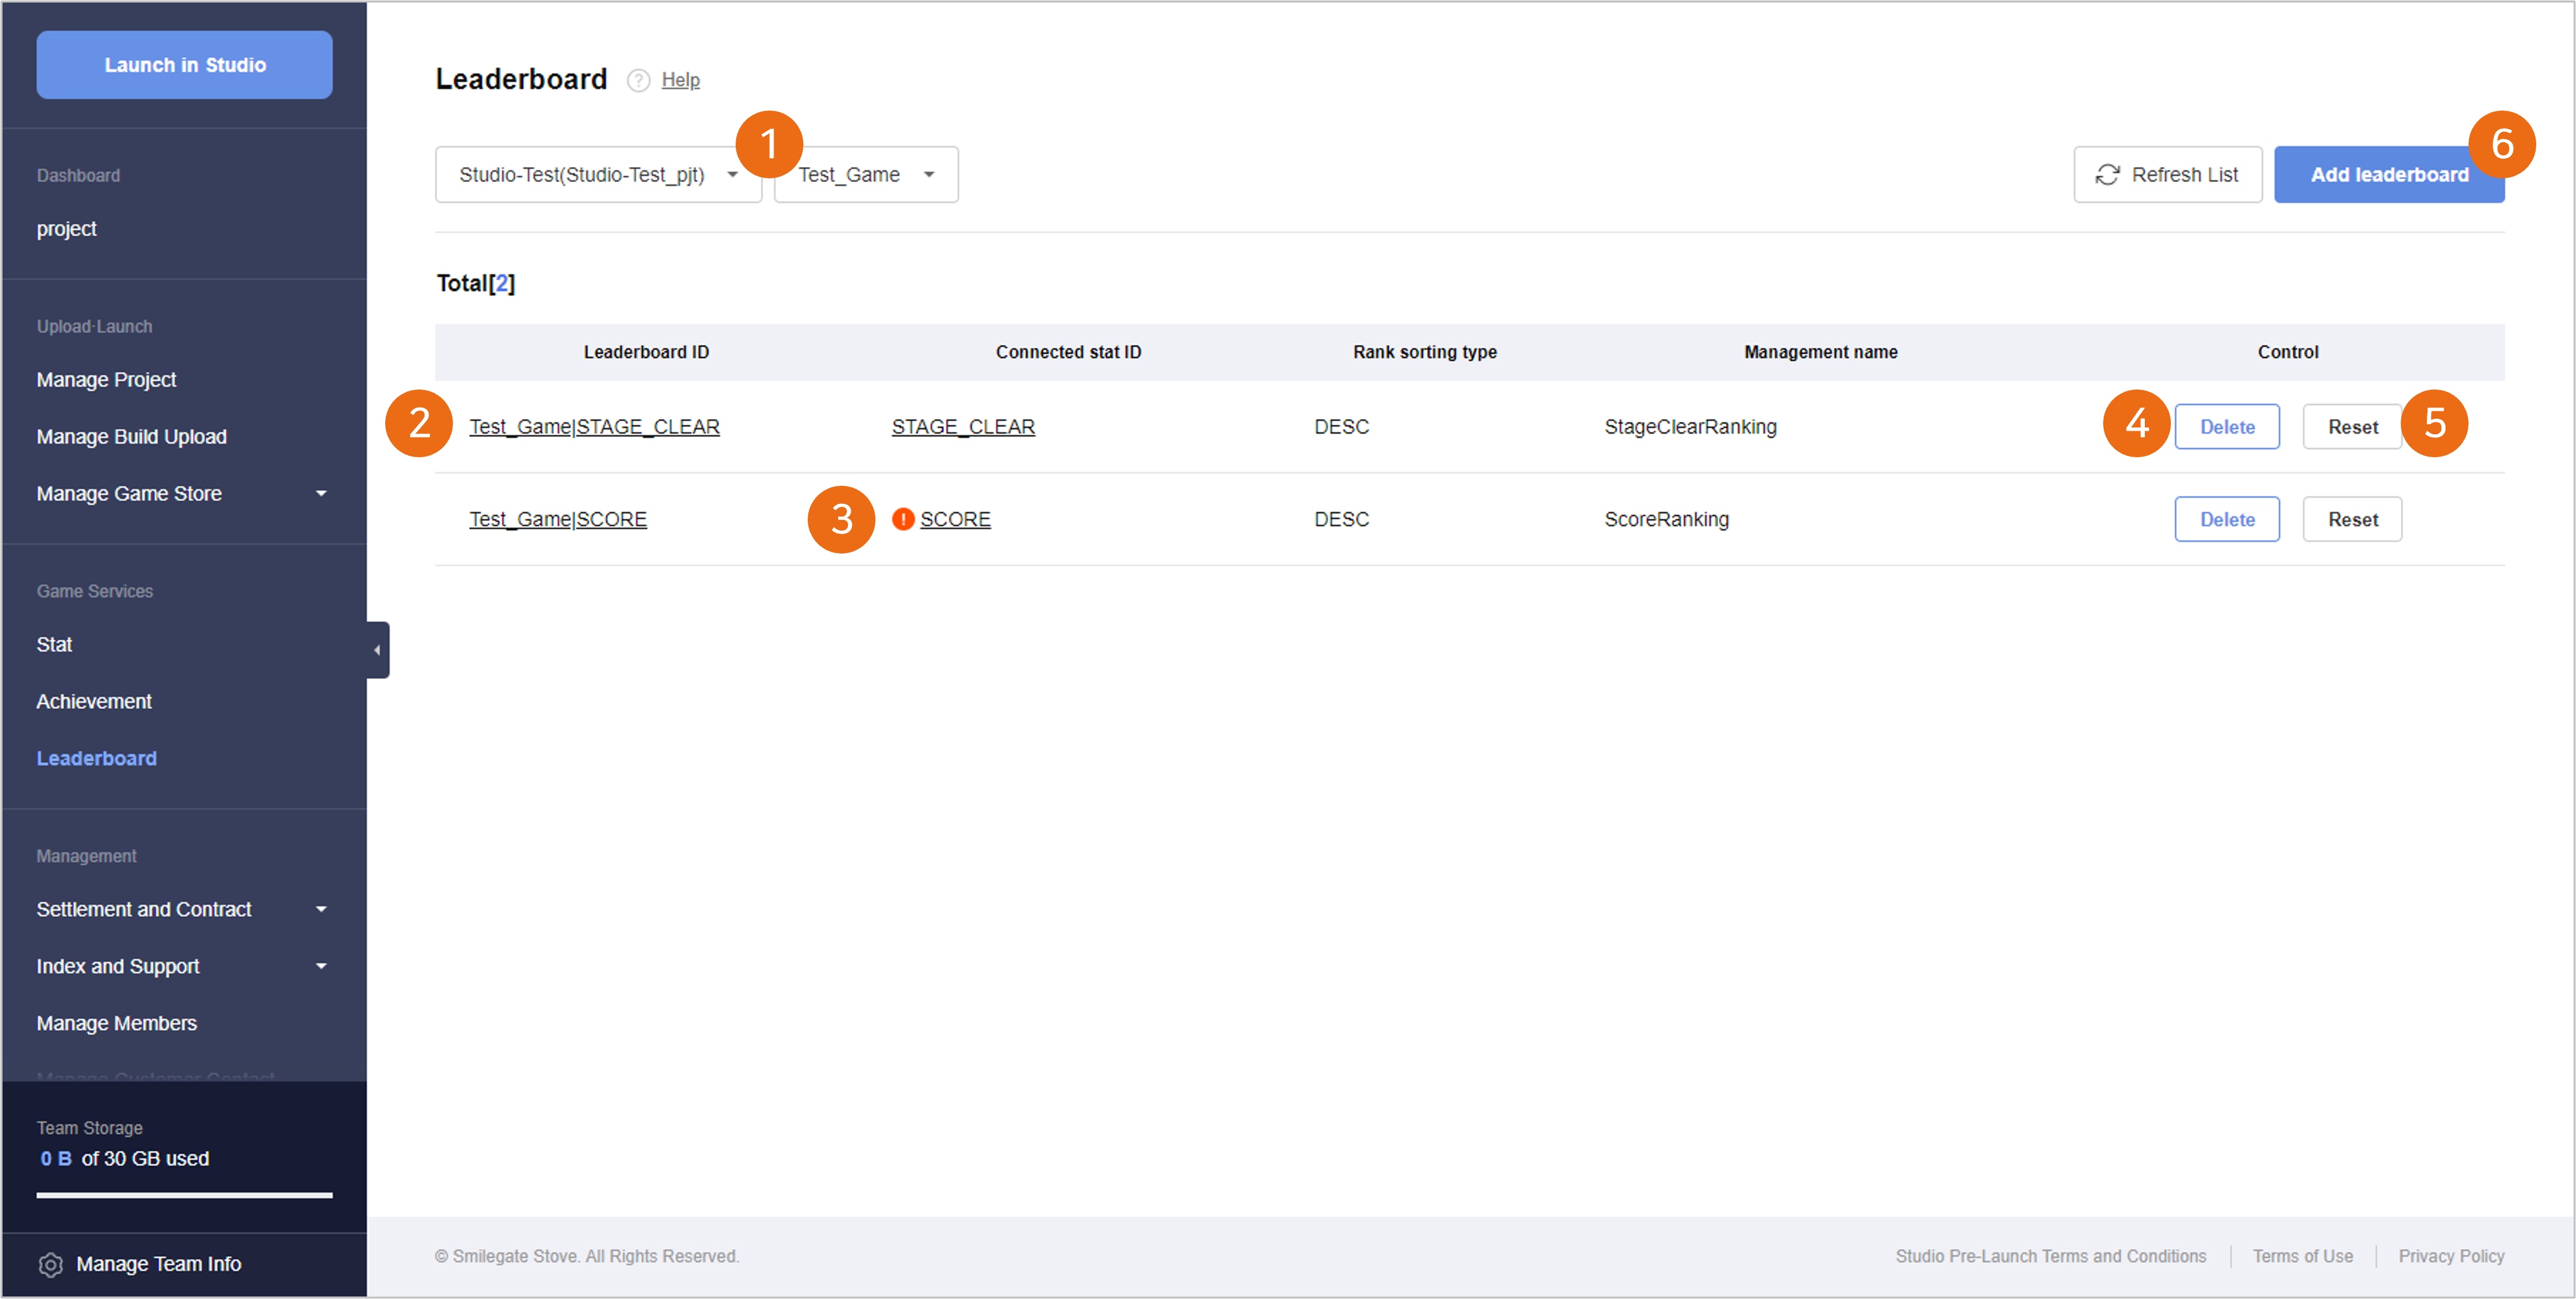
① Select Project and Game ID
- Select the Project ID and the Game ID for checking or setting the leader board metadata.
- When there is no such Project ID or Game ID registered, checking or adding metadata can be limited.
② Leader Board Meta List
- You can check the Leader Board Metadata List registered under the relevant Game ID.
- When you select a Leader Board ID, you can check the details of the registered metadata and can edit the additional information.
- When you select a Stat ID, you can check the details of the stat metadata linked to the relevant leader board.
③ Linked Stat Deletion Status Notification
- When the stat metadata linked to the leader board are deleted, the Emphasis Mark will appear on the Link Stat ID.
- Here, normal operation is impossible, so you must check whether the relevant leader board is used or not, delete the leader board, or reset the link stat metadata.
④ Delete Leader Board Meta
- You can delete the registered leader board metadata.
- When you delete leader board metadata, the loaded ranking data are also deleted, so you need to be careful.
⑤ Reset Leader Board Data
- Reset the ranking data loaded on the leader board.
- When you reset, the leader board metadata are maintained, and only the loaded user ranking data are reset.
⑥ Add Leader Board
- When you select the Add Leader Board button, the Add Leader Board Metadata pop-up will appear.
# 2) Add Leader Board Metadata
You can add leader board metadata through the Register Leader Board Meta pop-up.
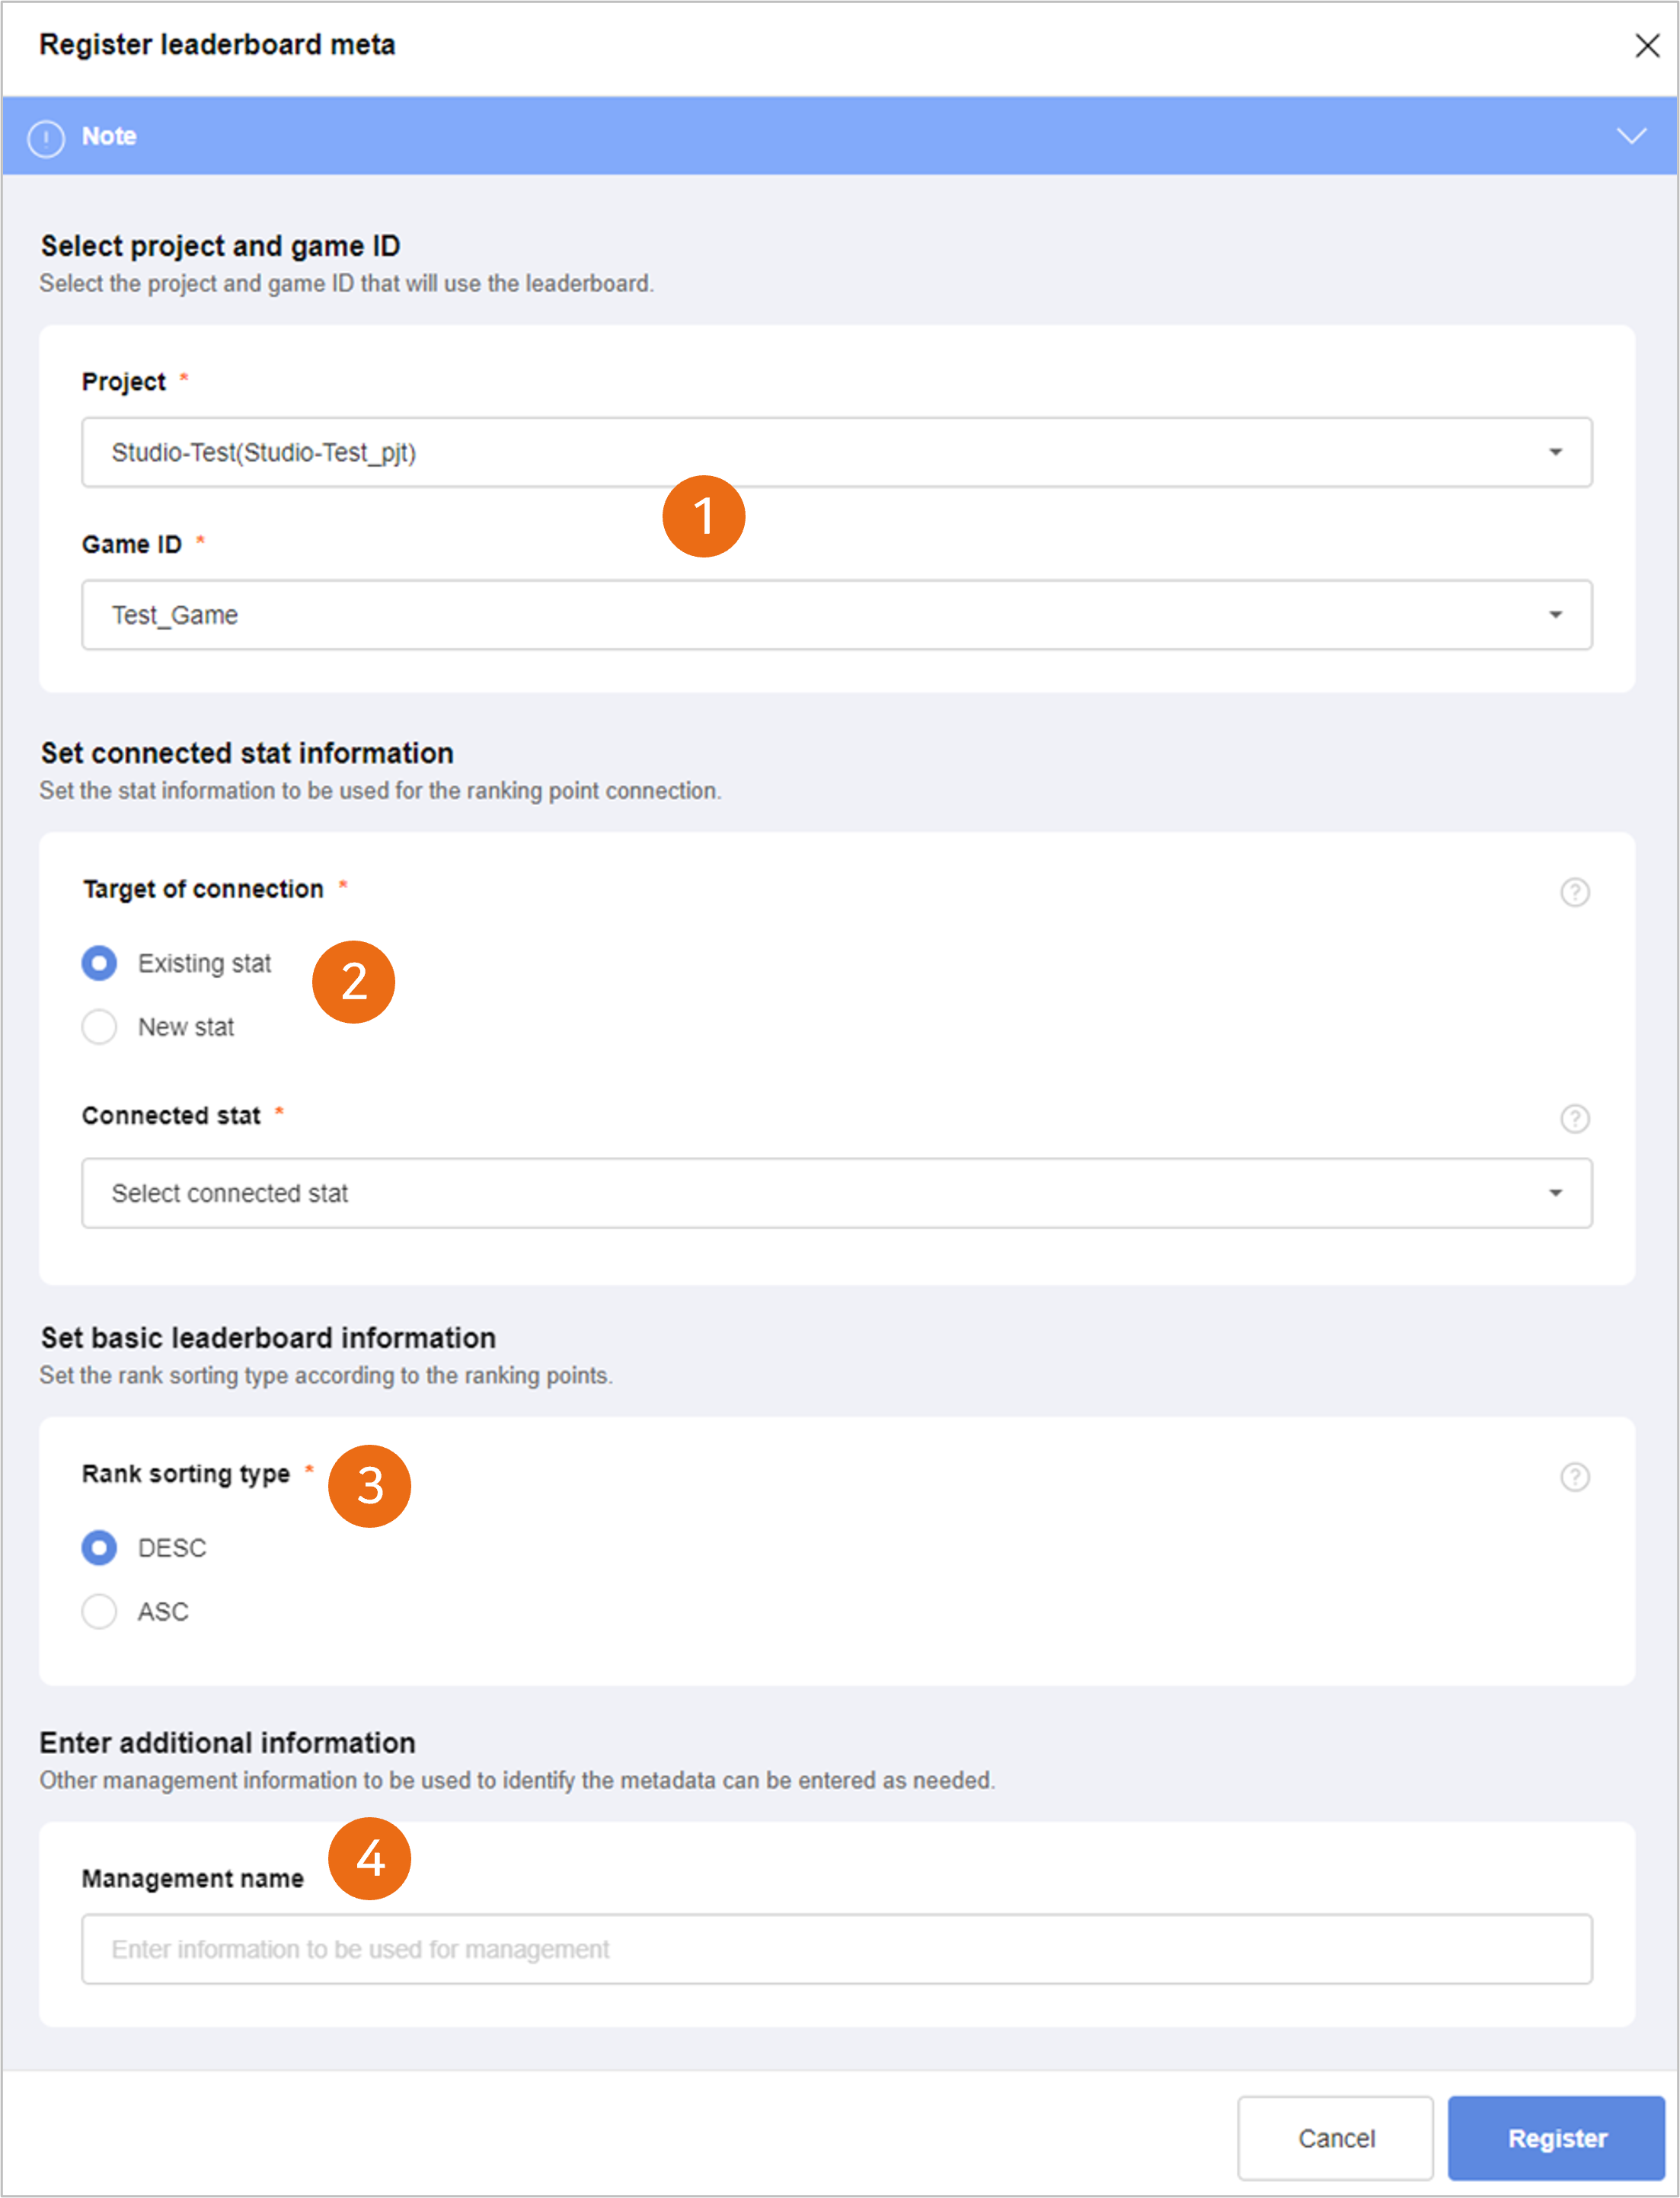
① Select Project and Game ID
- Select the Project ID and the Game ID for registering the leader board metadata.
② Set Link Stat Information
- Set the stat information to link to ranking points.
- The game play data are loaded as ranking points through the linked stat.
- When there is no registered stat to be linked, you can select the new stat creation method and register them all.
③ Select Rank Alignment Type
- Set the rank alignment type in accordance with the ranking points.
- The rank chart is composed in accordance with the set type.
- The provided set types are as below.
- DESC: The player with the highest ranking points becomes the first.
- ASC: The player with the lowest ranking points becomes the first.
- When the update type of the linked stat is MAX, it is replaced with only a value greater than the existing value, so the alignment type is fixed as DESC.
- When the update type of the linked stat is MIN, it is replaced with only a value smaller than the existing value, so the alignment type is fixed as ASC.
④ Input Additional Information (Management Name)
- Select and enter the management information to be used for identifyng metadata as needed.
When the leader board metadata are completely registered, the Leader Board ID is automatically created by the combination of the ‘Game ID’ and the ‘Linked Stat ID.’
The leader board metadata can be registered only by the relation of one to one with the linked stat, and the creation of multiple rank charts with the same conditions is limited.
The created Leader Board ID can be checked on the Metadata Registration Complete pop-up or the Leader Board List screen.