# Releasing DLC
# 1. Register game ID
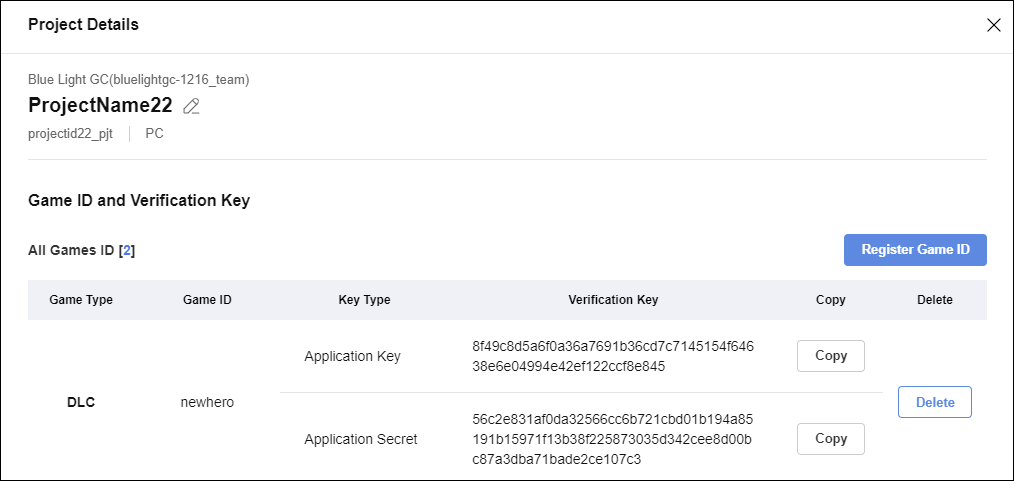
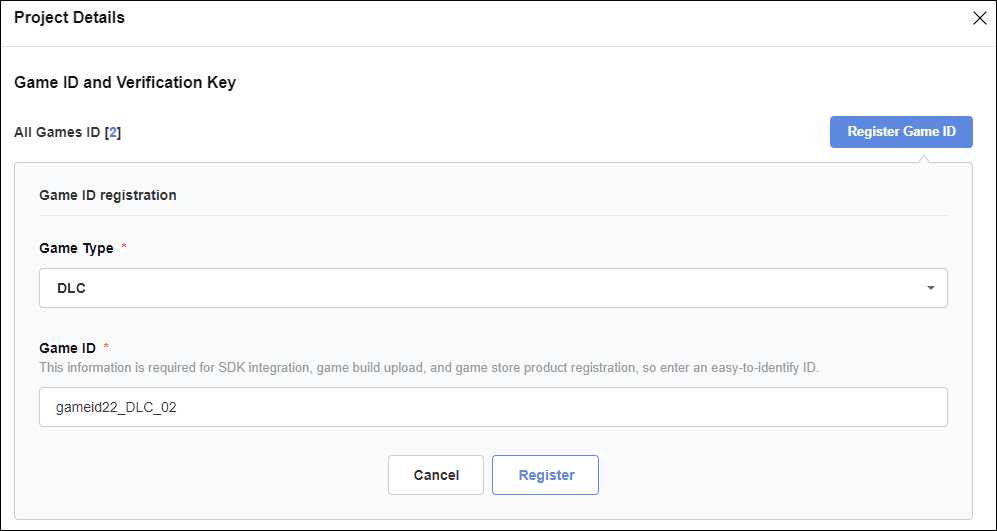
(1) Click the Manage Project menu on the left of STOVE Studio (opens new window), select a project on the screen, and click the Register Game ID button.
# 2. Upload DLC Build
(1) Click the Manage Build Upload menu on the left and click the Upload button on the upper right.
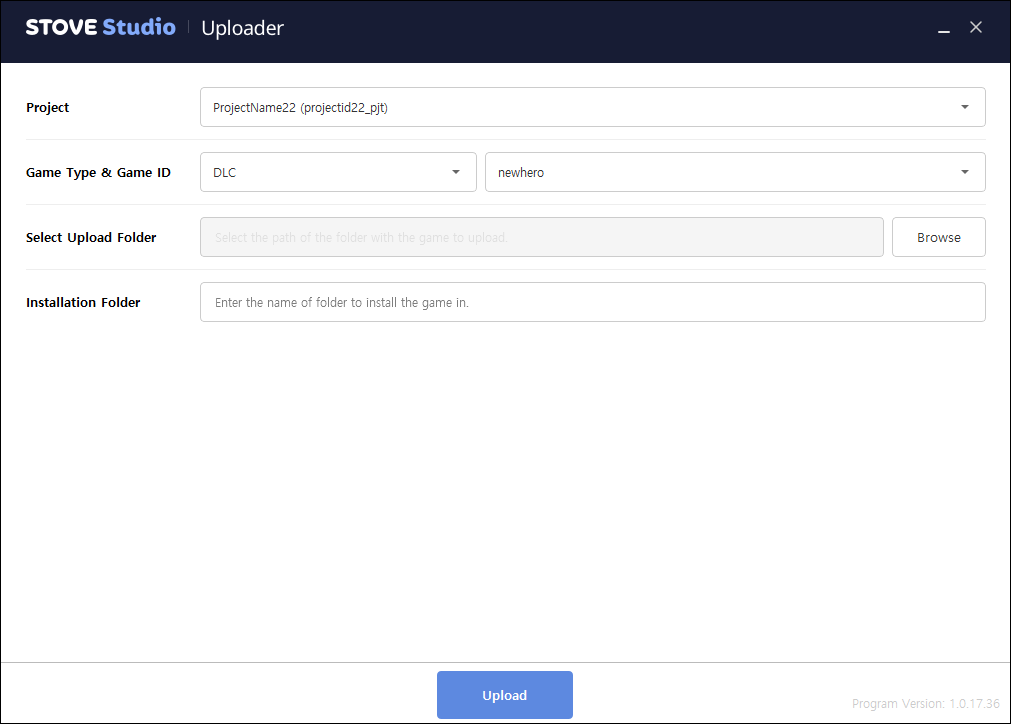
(2) Select DLC for Game Type and Game ID
(3) Select upload folder, selects the folder with DLC data to upload.
(4) In Installation Folder, enter the folder name where you will install DLC on the PC.
- For example, enter data if you need DLC data in the
datafolder of the build. - If the DLC data should be in the
data\dlcfolder, enter data\dlc.
(5) Click the Upload button.
# 3. Registration and Inspection
(1) Click the Manage Game Store> Register and Review menu on the left, and then click the Register New Game Product button at the top right of the screen. Select the game product type as DLC, and select the project and game ID.

(2) Click the Next button to create a store page, and fill in the store page`s contents, such as basic information, specifications, and build for the game.
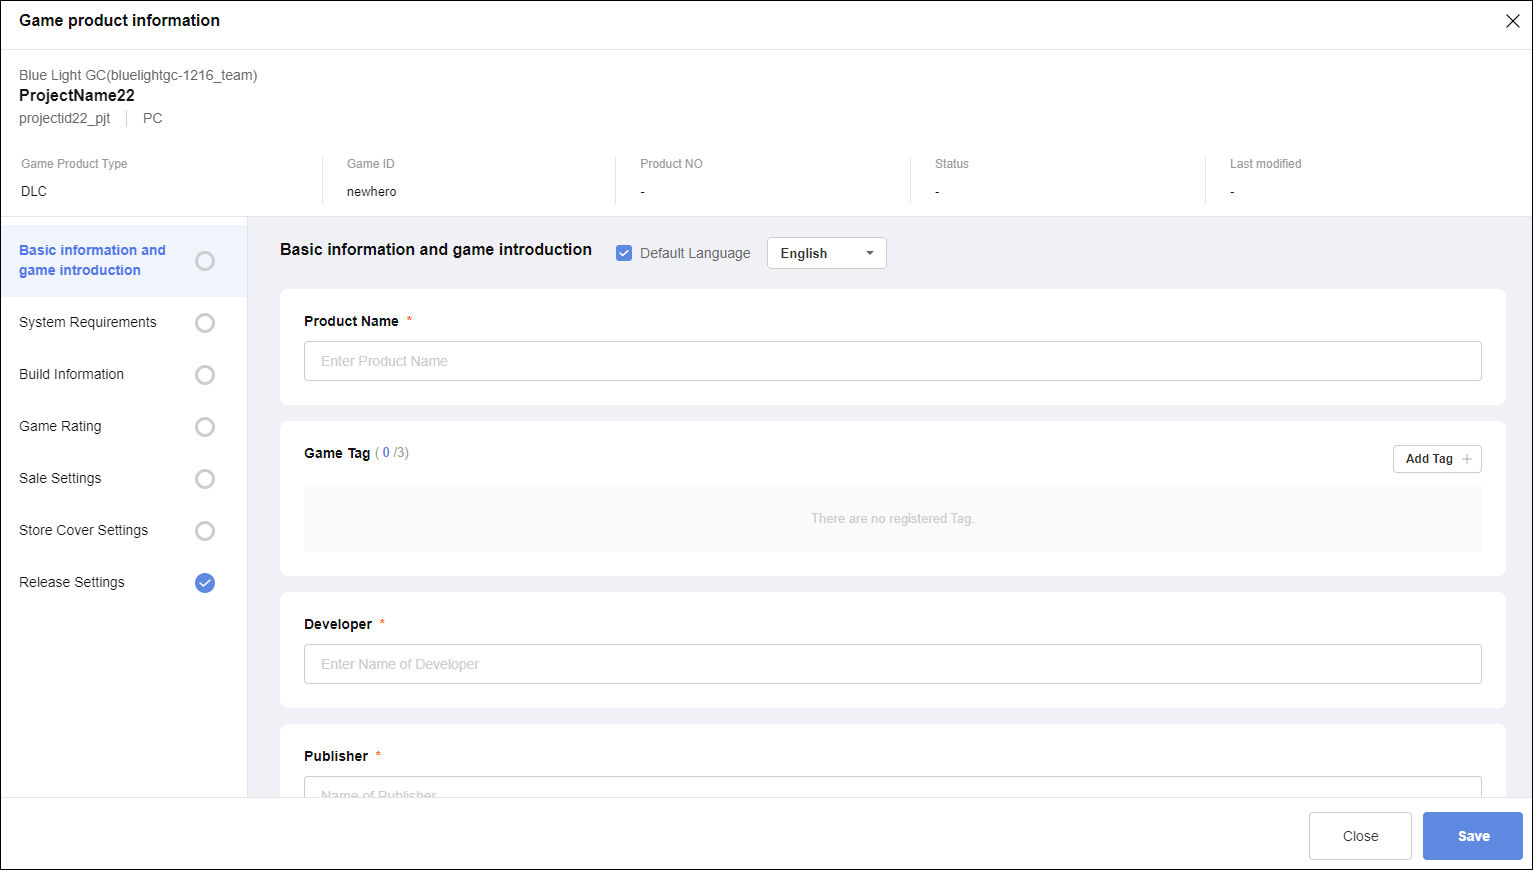
Notes when filling out the store page
Please check English as the default language. The product page is displayed according to the user's OS default language.
If a space is included in the file name of the screenshot and video thumbnail files in theBasic information and game introductionsections, it cannot be uploaded.
Example: test screenshottest_screeenshot

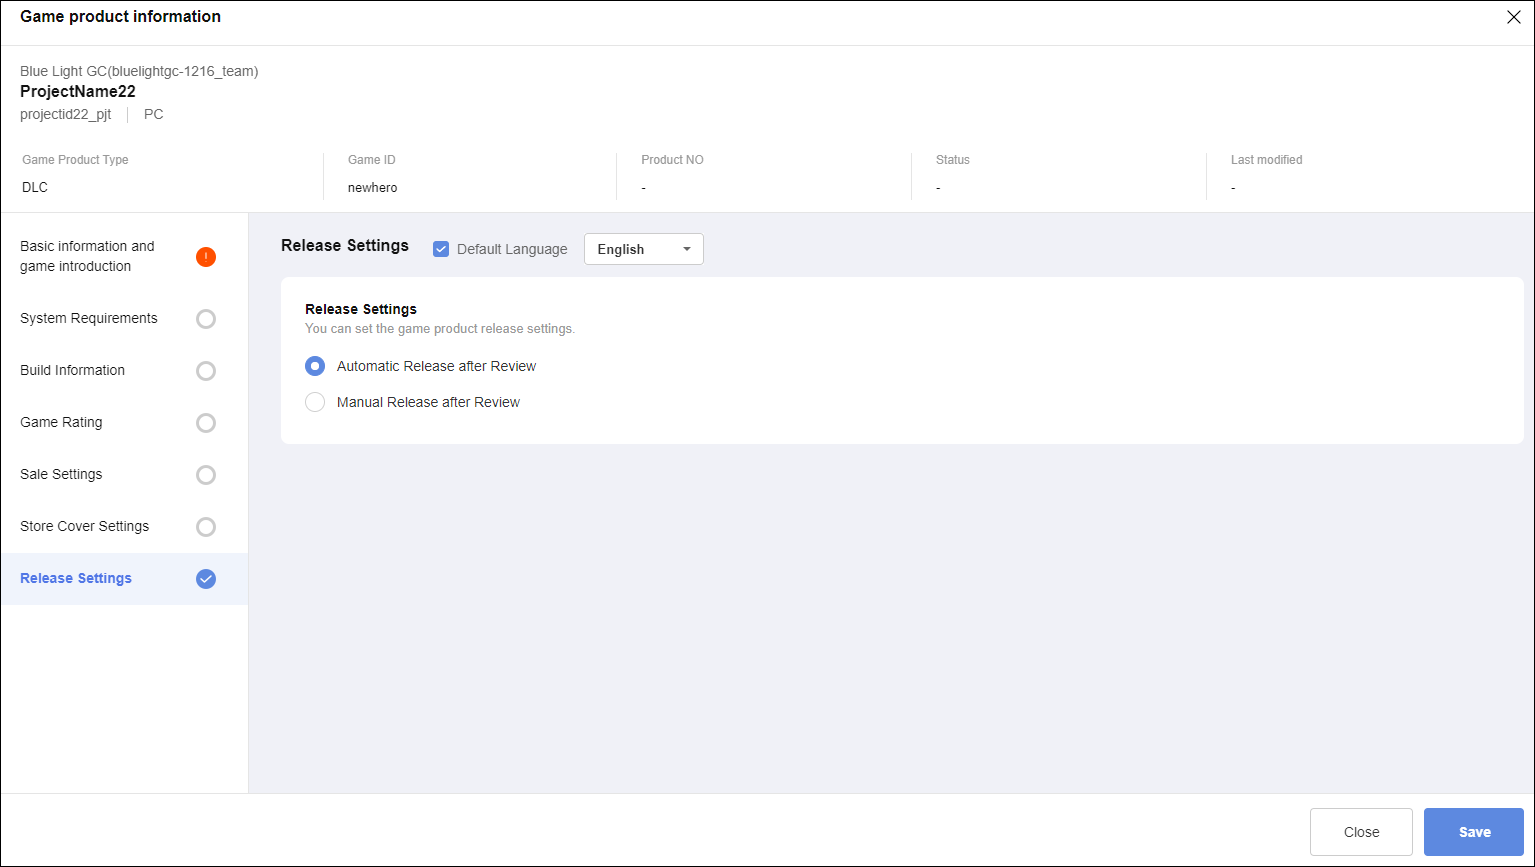
(3) If you select Automatic release after Review in the release settings, the game will be automatically released without any additional manipulation if STOVE passes the review after requesting it.